本文共 5368 字,大约阅读时间需要 17 分钟。
 近日来申请通过CSDN准专家,为了顺利在六个月后升级为认证专家,并对得起这个勋章,我感觉 不能松懈博客的更新频率以及质量了。C/C++ windows下的开发是我相对来说做的比较多的地方,对于Linux下的服务器开发 等等也算是半路出家,恰逢近来在研究分布式存储,涉及到了 Nginx 扩展开发以及配置,查阅了好多的资料发现Nginx配置部署起来相当的容易,但是源代码是真的晦涩难懂,经常会看的我们百思不得其解,所以扩展开发Nginx模块也不是一个轻松的事情,那我就从Nginx扩展模块开始,一步一步剖析Nginx源代码,
~~太暴力了有木有。
参考了下一些开源代码的实现发现,Nginx代码看似天书实际上是有理可依据的,在Nginx下 我们大约可以写三种类型的扩展 ,我只打算写一个简单的http扩展~但是这带领入门足矣。
1、http扩展
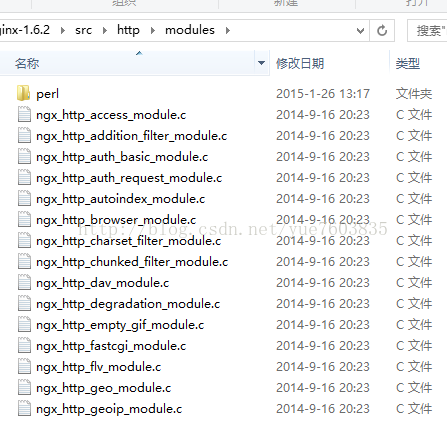
如下图所示的扩展 这些扩展是Nginx自带的 下面我打算仿写的就是这一类扩展 形似神似的东西
2、Filter过滤器
这家伙能干的事情可大了~我们可以把我们的Filter挂接到Nginx的Filter上,进行数据流过滤,具体应用在什么地方大家自己考虑去 ,这里不做解释了。
3、负载均衡器
你是否抱怨过 Nginx的 轮询机制 IP_HASH 以及 服务器权重方式 实现的负载均衡达不到想到的效果? 既然Nginx不能满足你的需求 你需要自己满足自己的需求,你可以扩展一个自己的负载
均衡器。
多说无用啊~~~~还是先上代码吧
英文Ubuntu下搜狗出了点问题 Qt下打不出中文了,注释部分写了英文 凑合看吧。英文也不规范
/**************************************************** * Nginx Extension Module By YDW * ********************************************************///定义了一堆宏 并且根据预编译选项 区分不同的操作系统加载不同的配置文件#include //nginx内核头文件 包含了nginx所需要的基本头文件 以及 定义了部分nginx 结构体的别名#include //nginx类型 string ngx_str_t 作者真够变态的 所有的类型 操作函数 都自己定义了一遍 而且开发扩展nginx 有些时候必须要用//作者提供的ngx 系列的类型和函数 这个切记#include //定义了处理http协议的结构和函数#include //define nginx hello_ydw module struct 定义typedef struct{ //nginx style of string ngx_str_t output_words;} ngx_http_hello_ydw_loc_conf_t;//process the hello_ydw commandstatic char* ngx_http_hello_ydw(ngx_conf_t* cf, ngx_command_t* cmd, void* conf);//allocate memory for hello world commandstatic void*ngx_http_hello_ydw_create_loc_conf(ngx_conf_t*cf);//copy hello ydw argument to another place static char* ngx_http_hello_ydw_merge_loc_conf(ngx_conf_t*cf,void*parent,void *child);//structure for hello_ydw Command// Structure for the HelloWorld commandstatic ngx_command_t ngx_http_hello_ydw_commands[] = { { ngx_string("hello_ydw"), // The command name NGX_HTTP_LOC_CONF | NGX_CONF_TAKE1, ngx_http_hello_ydw, // The command handler 处理命令的函数 NGX_HTTP_LOC_CONF_OFFSET, offsetof(ngx_http_hello_ydw_loc_conf_t, output_words), NULL }, ngx_null_command};// Structure for the HelloWorld contextstatic ngx_http_module_t ngx_http_hello_ydw_module_ctx = { NULL, NULL, NULL, NULL, NULL, NULL, ngx_http_hello_ydw_create_loc_conf, ngx_http_hello_ydw_merge_loc_conf};// Structure for the HelloWorld module, the most important thingngx_module_t ngx_http_hello_ydw_module = { NGX_MODULE_V1, &ngx_http_hello_ydw_module_ctx, ngx_http_hello_ydw_commands, NGX_HTTP_MODULE, NULL, NULL, NULL, NULL, NULL, NULL, NULL, NGX_MODULE_V1_PADDING};//注意这里才是主要的http请求处理函数static ngx_int_t ngx_http_hello_ydw_handler(ngx_http_request_t* r) { ngx_int_t rc; ngx_buf_t* b; ngx_chain_t out[2]; ngx_http_hello_ydw_loc_conf_t* hlcf; hlcf = ngx_http_get_module_loc_conf(r, ngx_http_hello_ydw_module); r->headers_out.content_type.len = sizeof("text/plain") - 1; r->headers_out.content_type.data = (u_char*)"text/plain"; b = ngx_pcalloc(r->pool, sizeof(ngx_buf_t)); out[0].buf = b; out[0].next = &out[1]; b->pos = (u_char*)"hello_ydw, "; b->last = b->pos + sizeof("hello_ydw, ") - 1; b->memory = 1; b = ngx_pcalloc(r->pool, sizeof(ngx_buf_t)); out[1].buf = b; out[1].next = NULL; b->pos = hlcf->output_words.data; b->last = hlcf->output_words.data + (hlcf->output_words.len); b->memory = 1; b->last_buf = 1; r->headers_out.status = NGX_HTTP_OK; r->headers_out.content_length_n = hlcf->output_words.len + sizeof("hello_ydw, ") - 1; rc = ngx_http_send_header(r); if (rc == NGX_ERROR || rc > NGX_OK || r->header_only) { return rc; } return ngx_http_output_filter(r, &out[0]);}//这个函数只是在nginx内存池分配了一个 结构static void* ngx_http_hello_ydw_create_loc_conf(ngx_conf_t* cf) { ngx_http_hello_ydw_loc_conf_t* conf; conf = ngx_pcalloc(cf->pool, sizeof(ngx_http_hello_ydw_loc_conf_t)); if (conf == NULL) { return NGX_CONF_ERROR; } conf->output_words.len = 0; conf->output_words.data = NULL; return conf;}//合并父子配置文件static char* ngx_http_hello_ydw_merge_loc_conf(ngx_conf_t* cf, void* parent, void* child) { ngx_http_hello_ydw_loc_conf_t* prev = parent; ngx_http_hello_ydw_loc_conf_t* conf = child; ngx_conf_merge_str_value(conf->output_words, prev->output_words, "Nginx"); return NGX_CONF_OK;}//处理 hello_ydw命令的函数static char* ngx_http_hello_ydw(ngx_conf_t* cf, ngx_command_t* cmd, void* conf) { ngx_http_core_loc_conf_t* clcf; clcf = ngx_http_conf_get_module_loc_conf(cf, ngx_http_core_module); clcf->handler = ngx_http_hello_ydw_handler; ngx_conf_set_str_slot(cf, cmd, conf); return NGX_CONF_OK;} 代码编写玩了 现在我们来编写编译配置文件 config复制一个开源扩展的格式我们修改下即可
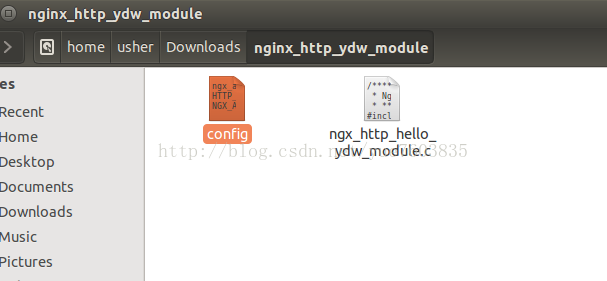
ngx_addon_name=ngx_http_hello_ydw_moduleHTTP_MODULES="$HTTP_MODULES ngx_http_hello_ydw_module"NGX_ADDON_SRCS="$NGX_ADDON_SRCS $ngx_addon_dir/ngx_http_hello_ydw_module.c"代码配置文件 写完了 现在我们建立一个 文件夹 ngx_http_hello_ydw_module 来存放 config 和 ngx_http_hello_ydw_module.c结构如下 好了我们的模块就编写好了啊~~~~~
开始编译安装吧我用的是Nginx_1.62 ,我们下载nginx源代码 解压
依次
./configure --add-module=../nginx_http_ydw_module/ --prefix=/usr/local/nginx2 --conf-path=/etc/nginx2/nginx.conf
make&&make install
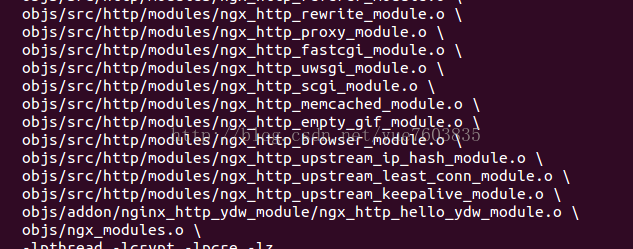
看到如下结构 最后ngx_http_hello_ydw_module.o已经编译完毕 说明我们的扩展编译成功了
等待make install结束安装 。
好了编译安装完nginx 那么我们首先修改Nginx的配置文件 nginx.conf
添加上一行
location /hello_ydw
{
#处理hello_ydw命令 这个命令我们在代码声明过得哦。 hello_ydw ExtensionSuccessful; }
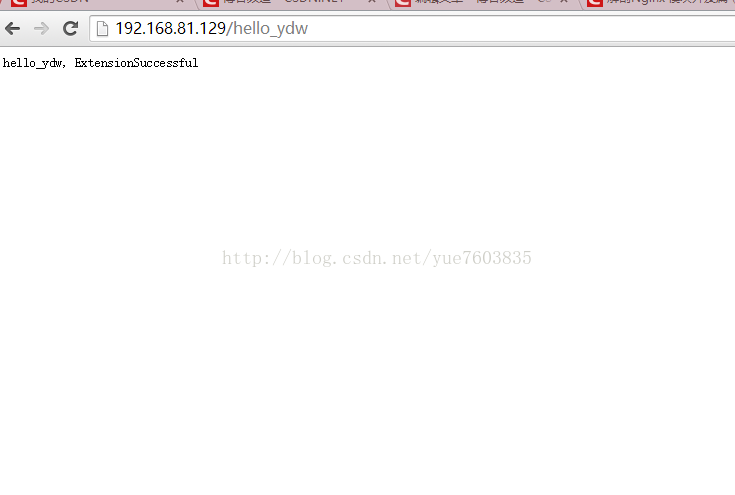
现在启动Nginx
/usr/local/nginx2/sbin/nginx
现在开始测试效果吧 看吧成功了 到了这一步意味着你可以自己写Nginx的扩展程序了哦